Once Recurio is installed and configured, the next step is to create your first subscription product.
This guide walks you through each step — from product creation to subscription settings — so you can learn how to create your first subscription product and start selling recurring plans quickly and confidently.
Step 1: Access Product Creation Page
- Log in to your WordPress Admin Dashboard.
- Navigate to Products → Add New.
- Enter the following details:
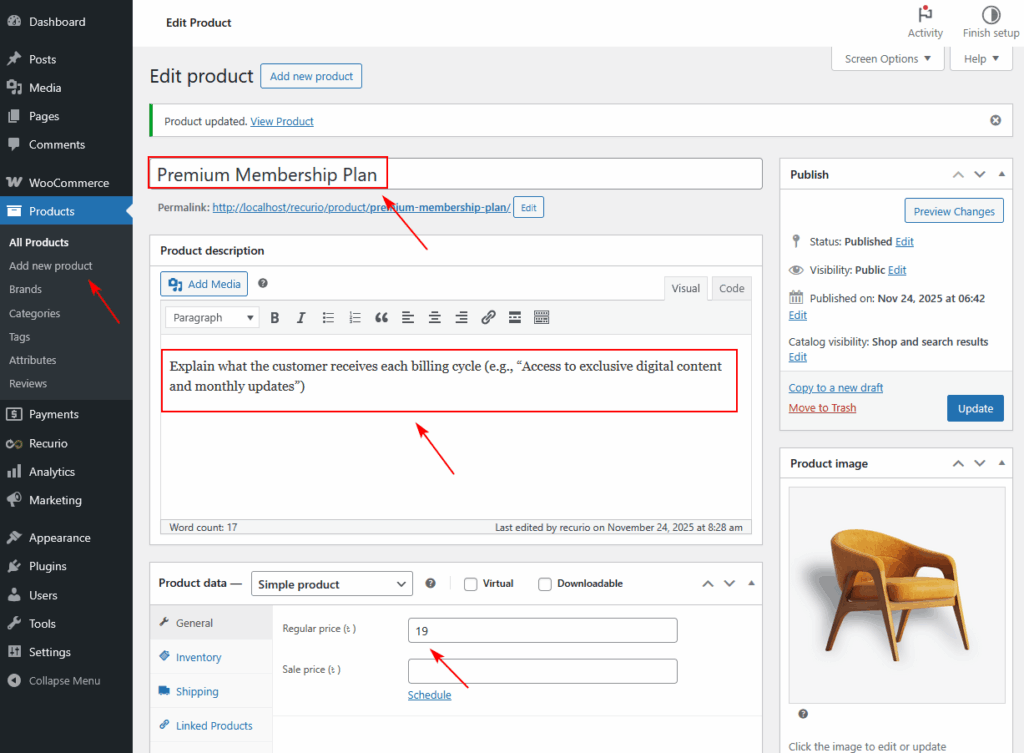
- Product Name: Example – Premium Membership Plan
- Description: Explain what the customer receives each billing cycle (e.g., “Access to exclusive digital content and monthly updates”).
- Price: Set the product price (e.g., $29.99) to define the recurring billing amount charged each billing period.
Tip: Keep product names short but descriptive — it helps customers recognize recurring plans easily.
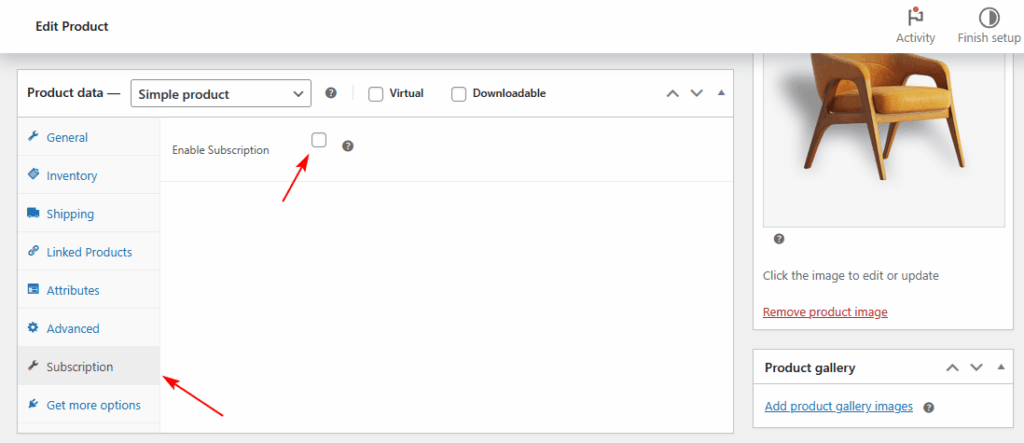
Step 2: Configure Product Type
- Scroll down to the Product Data panel.
- Choose Product: Recurio supports both Simple and Variable products. For most use cases, a Simple Product offers the quickest setup, while Variable Products allow you to offer flexible subscription options with multiple variations.
- Click the Subscription tab within the Product Data panel.
- Toggle Enable Subscription → ON
This converts your regular product into a subscription-based product.
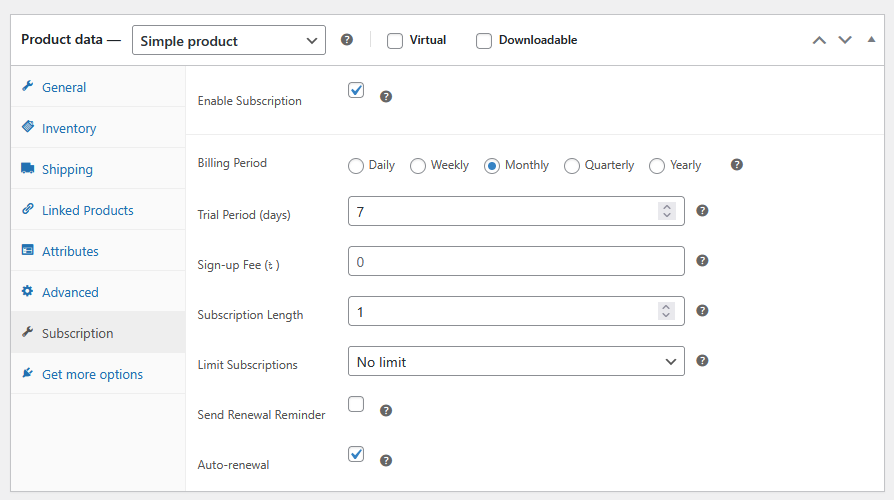
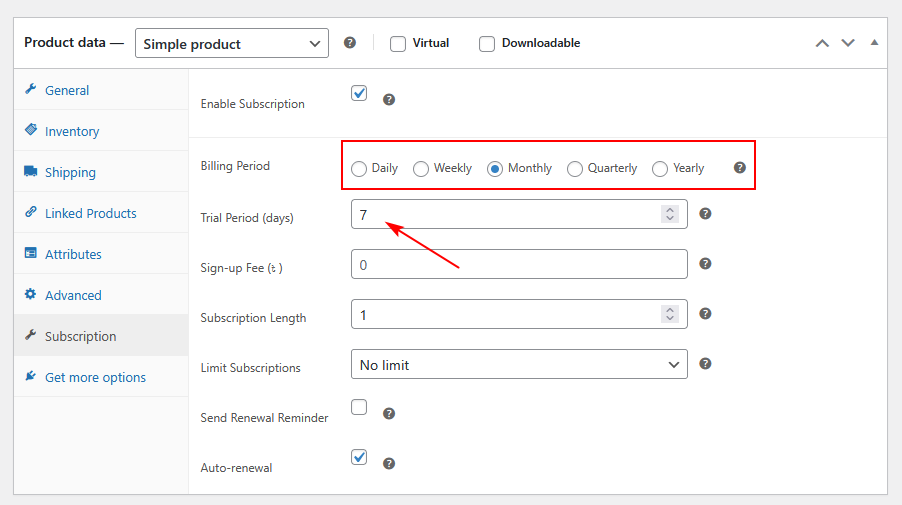
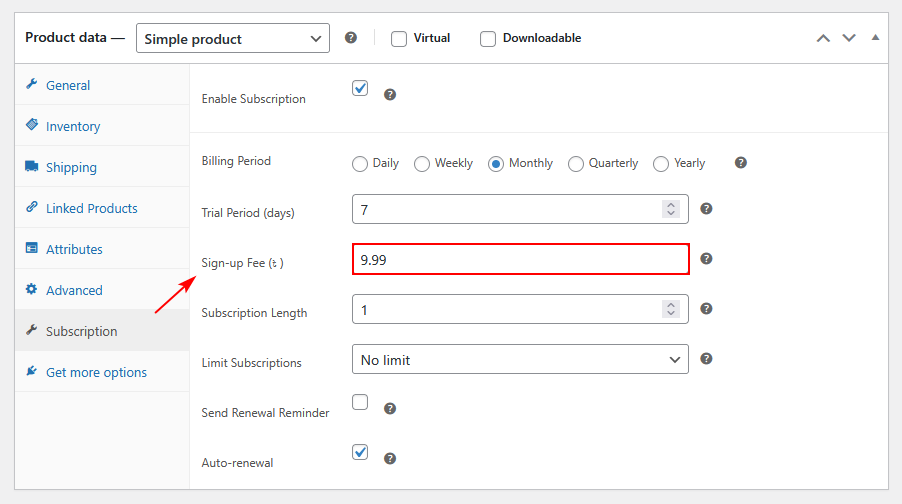
Step 3: Set Subscription Billing Details
Now, define how and when customers are billed.
| Setting | Description | Example |
|---|---|---|
| Billing Period | Frequency of billing | Monthly / Yearly (Free) or Weekly / Quarterly (PRO) |
| Billing Interval | Number of periods between charges | 1 = every 1 month / 3 = every 3 months |
| Subscription Length | How long subscription continues | Leave blank = unlimited; 12 = ends after 12 renewals |
Example:
- Billing Period: Monthly
- Billing Interval: 1
- Subscription Length: Blank (unlimited)
→ The customer is billed every month indefinitely until cancellation.
Step 4: (Optional) Add a Trial Period
Offering a trial helps attract more sign-ups by letting users experience your product before payment.
| Setting | Description | Example |
|---|---|---|
| Trial Length | Duration of trial before first payment | 7 |
| Trial Unit | Unit of time | Days / Weeks / Months |
Example:
- Trial Length: 7
- Trial Unit: Days
→ Customer gets a 7-day free trial, then automatic billing begins.
Tip: Keep trials between 7–14 days for digital services. Longer trials can reduce urgency to subscribe.
Step 5: (Optional) Add a Sign-Up Fee
A Sign-Up Fee lets you charge an upfront amount when customers first subscribe — useful for onboarding costs, setup fees, or physical shipment expenses.
| Setting | Description | Example |
|---|---|---|
| Sign-Up Fee | One-time charge at subscription start | $9.99 |
Example:
→ Customer pays $9.99 setup fee + $29.99 recurring monthly after trial ends.
Step 6: Define Pricing
- Go to the General tab (under Product Data).
- Enter Regular Price — this is your recurring billing amount.
- (Optional) Add a Sale Price if you want a discounted rate for the first billing cycle.
Example:
- Regular Price: $29.99
- Sale Price: $19.99 (optional)
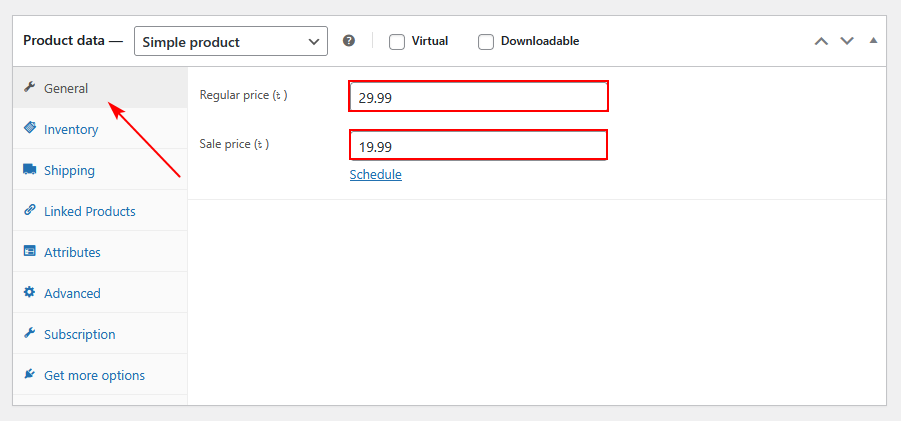
Tip: Recurio automatically manages recurring renewals; no need to add multiple variations for recurring payments.
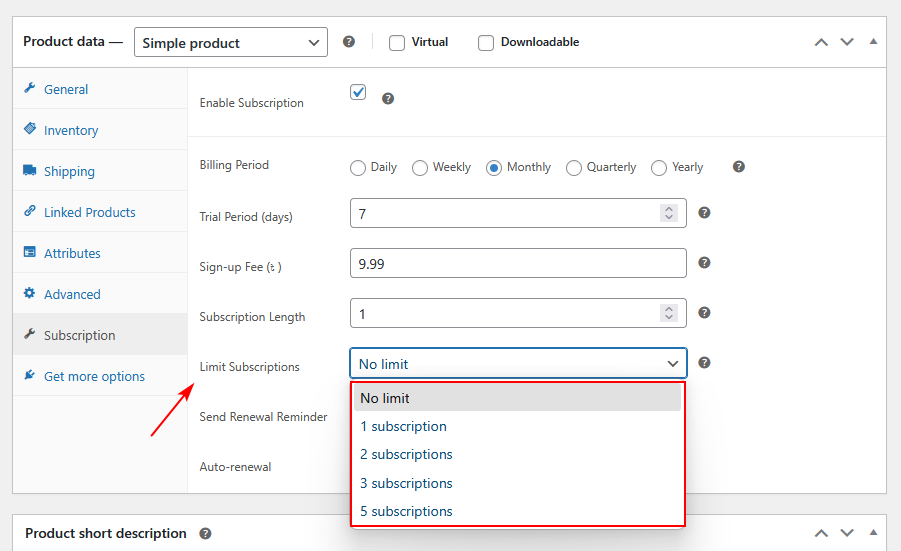
Step 7: Limit Subscriptions per Customer (Optional)
You can prevent customers from purchasing the same subscription multiple times.
- In the Subscription Settings panel, locate Limit Per Customer.
- Choose one of the following:
- 1 Subscription → Customer can only buy once.
- Unlimited → No restriction (default).
Use Case:
Limit per customer = 1 → Ideal for SaaS or membership products.
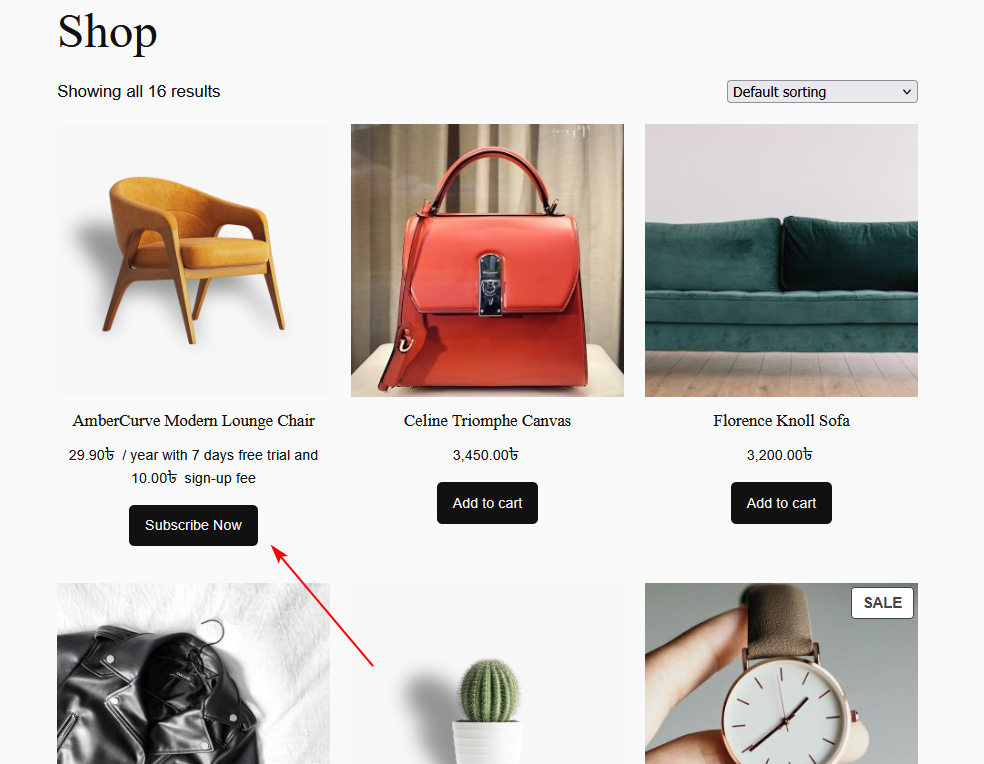
Step 8: Add Product Image and Categories
- Add a Product Image that visually represents the plan.
- (Optional) Add Product Gallery images for visual appeal.
- Assign appropriate Categories or Tags (e.g., Subscriptions, Memberships, Digital Plans).

Tip: Use a clear, minimal image — consistency helps customers identify your plans quickly.
Step 9: Publish the Product
- Double-check your settings:
- Subscription Enabled
- Billing and Trial configurations correct
- Product description and price finalized
- Click Publish.
Your first subscription product is now live and ready for purchase!
Example Configurations
| Type | Configuration | Description |
|---|---|---|
| Basic Monthly Plan | $29.99 / month | Standard recurring billing |
| Annual Membership | $199.99 / year | Ideal for loyalty programs |
| Quarterly Box (PRO) | $49.99 / quarter | Seasonal subscription (requires PRO) |
| Free Trial Plan | 14-day trial + $29.99/month | Boosts conversions with low entry barrier |
| Setup Fee Plan | $9.99 sign-up + $19.99/month | Covers onboarding costs |
Step 10: Test the Product
Before going live, perform a test checkout:
- Open the product page on your site.
- Add the subscription product to the cart.
- Complete checkout using a test payment gateway (like Stripe test mode).
- Verify:
- Subscription is created in Recurio → Subscriptions.
- Payment is recorded correctly.
- Customer receives confirmation email.
Tip: Always test both trial and recurring renewals to ensure everything works as expected.
Troubleshooting
| Issue | Cause | Solution |
|---|---|---|
| Subscription tab missing | WooCommerce inactive | Ensure WooCommerce plugin is active |
| Trial settings not saving | Missing value | Enter both trial duration and unit |
| Payment not processed | Incompatible gateway | Use tokenized gateways like Stripe or PayPal |
| Product not appearing in shop | Draft mode | Check product status → Published |
| “Add to Cart” button missing | Subscription disabled | Verify “Enable Subscription” toggle is ON |
Quick Recap
By the end of this setup, you’ve learned to:
- Create a new WooCommerce product for recurring billing
- Configure billing periods, intervals, trials, and sign-up fees
- Limit subscriptions per customer
- Publish and test your first subscription product