Welcome to Recurio, the complete WooCommerce subscription management plugin that helps you turn one-time shoppers into loyal subscribers.
This guide will walk you through installation, setup, and your first live subscription — step by step.
What Is Recurio?
Recurio is a powerful subscription engine built for WooCommerce.
It lets you easily create, manage, and automate recurring billing with analytics, dunning, and customer self-service tools.
Core Benefits
- Full Control: Create, edit, pause, resume, and cancel subscriptions anytime
- Customer Self-Service: Customers manage their own plans via portal
- Revenue Insights: Track MRR, ARR, churn, and customer lifetime value
- Automation: Let Recurio handle renewals and failed payment retries
- Email Notifications: Automatically notify customers about all subscription events
Requirements
- WordPress: 5.8 or higher
- WooCommerce: 8.0 or higher (tested up to 10.1.2)
- PHP: 7.4 or higher
- MySQL: 5.6 or higher
Pre-Setup Checklist
Before you begin:
- WooCommerce is installed and active
- You can send emails from WordPress (test via WP Mail SMTP)
- Cron jobs are enabled (
DISABLE_WP_CRONis false) - Your test payment credentials (Stripe/PayPal sandbox) are ready
💡 Tip: Always test Recurio on a staging site before going live.
Step 1: Install Recurio
Option A — From WordPress Dashboard (Recommended)
- Go to Plugins → Add New → Upload Plugin
- Select the downloaded
recurio.zipfile - Click Install Now, then Activate
Option B — Manual FTP Upload
- Extract the
recurio.zipfile locally - Upload the
recuriofolder to/wp-content/plugins/ - Log into WordPress → Plugins, then click Activate
After activation, you’ll see:
- A Recurio menu in your admin sidebar
- A Subscription tab inside WooCommerce product editor
- A quick setup notice with helpful links
⚠️ Note: If the menu doesn’t appear, confirm that WooCommerce is active.
Step 2: Run the Quick Setup Wizard
When you open Recurio → Dashboard, the setup wizard launches automatically.
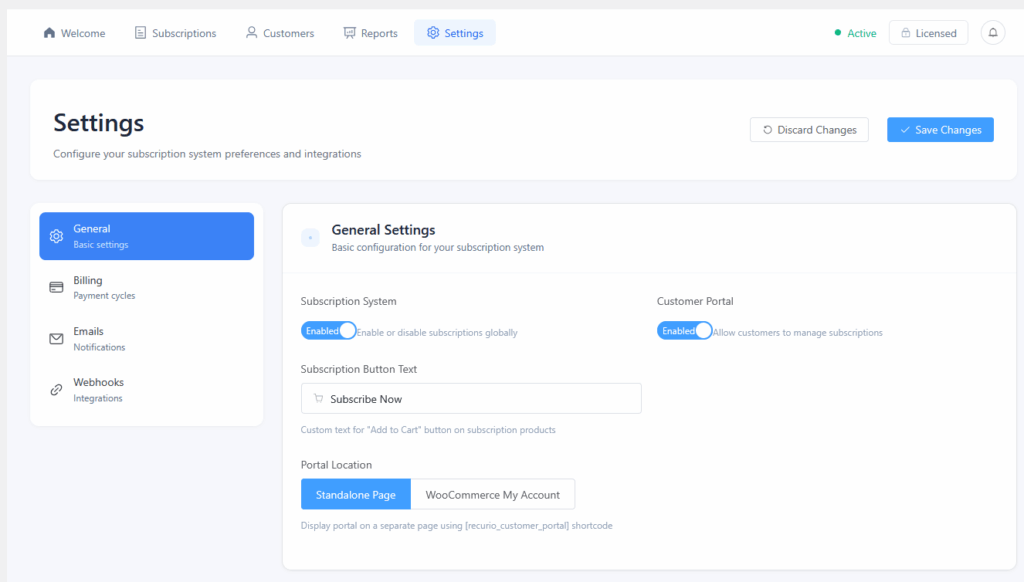
Step 2.1 — General Settings
Go to Recurio → Settings → General
- Toggle Enable Subscription System → ON
- Toggle Enable Customer Portal → ON
- Choose your Portal Location:
- Standalone Page → Use
:shortcoderecurio_customer_portal - WooCommerce My Account Tab → Adds “Subscriptions” tab automatically
- Standalone Page → Use
- Click Save Changes
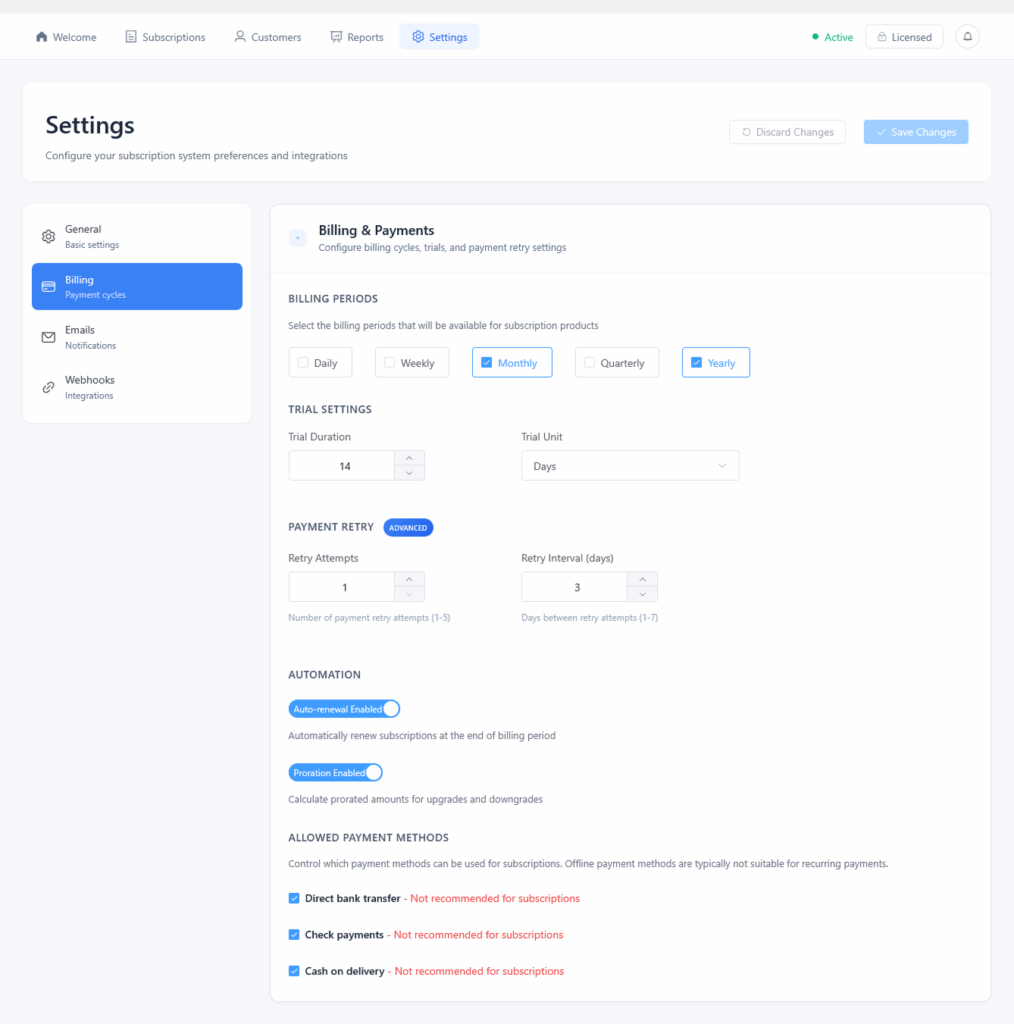
Step 2.2 — Billing Settings
Go to Recurio → Settings → Billing
| Feature | Free | Pro |
|---|---|---|
| Billing Periods | Monthly, Yearly | + Daily, Weekly, Quarterly |
| Retry Attempts | 1 (fixed) | 2–5 (configurable) |
| Retry Interval | 3 days | 1–7 days |
| Trials | Supported | Supported |
| Sign-Up Fee | Supported | Supported |
💡 Best Practice: Set 3 retry attempts with a 3-day gap for maximum payment recovery.
Recommended Gateways: Stripe or PayPal
Disable offline methods like COD or Bank Transfer — they don’t support automatic renewals.
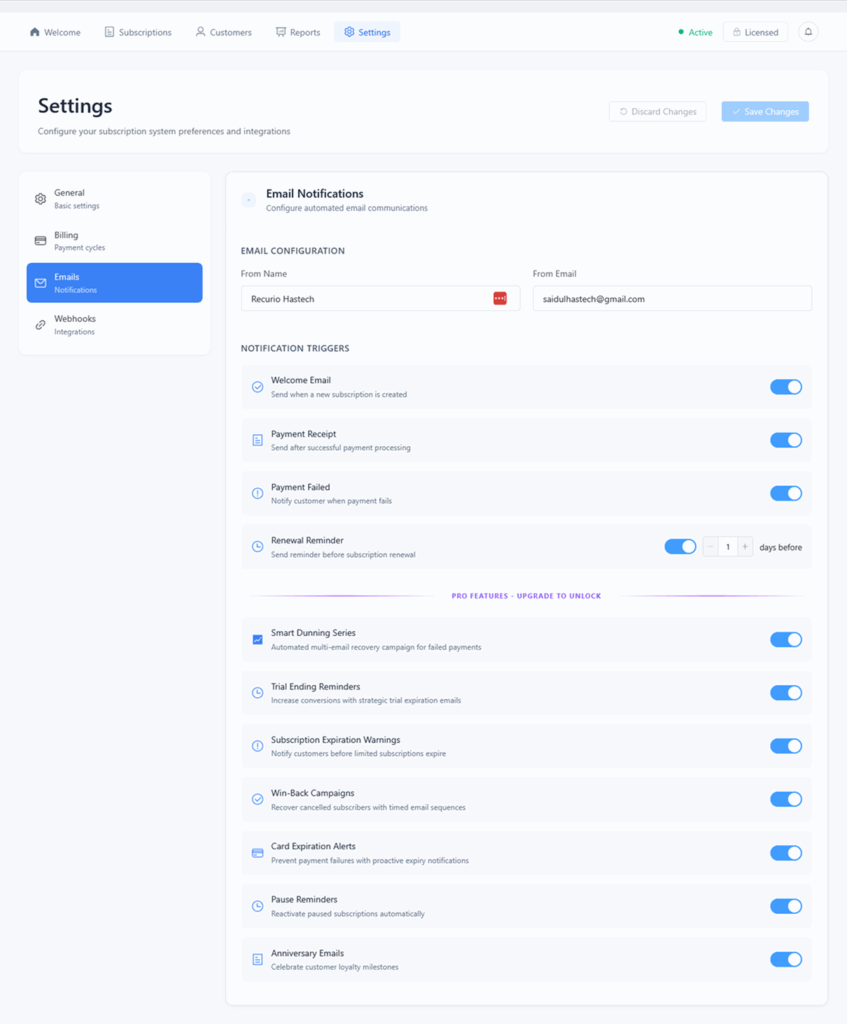
Step 2.3 — Email Notifications
Go to Recurio → Settings → Emails
- Fill in:
- From Name: e.g., “Acme Subscriptions”
- From Email: e.g.,
[email protected]
- Enable notifications:
- ✅ Welcome Email
- ✅ Payment Receipt
- ✅ Payment Failed
- ✅ Renewal Reminder (1–30 days, default: 7 days)
- Click Save Changes
✉️ You can later customize templates or enable Pro campaigns (Dunning, Trial Ending, Win-Back, etc.)
Step 3: Create Your First Subscription Product
- Go to Products → Add New
- Fill in:
- Product Name
- Description
- Price (e.g., $29.99)
- In Product Data → Subscription Tab:
- Enable Subscription: ✅
- Billing Period: Monthly
- Billing Interval: 1
- (Optional) Trial Period: 14 days
- (Optional) Sign-Up Fee: $9.99
- Click Publish
✅ Congratulations! Your first subscription product is ready.
Example Configurations
| Scenario | Period | Interval | Trial | Fee | Length |
|---|---|---|---|---|---|
| Netflix-style Monthly | Monthly | 1 | 7 days | – | Unlimited |
| Annual Membership | Yearly | 1 | – | $49 | Unlimited |
| Quarterly Box (Pro) | Quarterly | 1 | – | – | 4 renewals |
Step 4: Test the Workflow
- Enable Stripe/PayPal Sandbox Mode
- Purchase your new subscription using test credentials
- Verify:
- Subscription created and Active
- Next Payment Date scheduled
- Welcome + Receipt emails sent
- Customer can access it in the Portal
Step 5: Verify Cron Jobs
Recurio automates billing with WP-Cron.
- Install WP Crontrol plugin (optional)
- Go to Tools → Cron Events
- Confirm
recurio_process_paymentsis scheduled daily - (Optional) Click Run Now to trigger manually
If your host disables WP-Cron:
- Add this to
wp-config.phpdefine('DISABLE_WP_CRON', false); - Or set up a real cron to call
wp-cron.php
Step 6: Check the Customer Portal
Option A — Standalone Page
- Create a page named “My Subscriptions”
- Add
:recurio_customer_portal - Publish → Add to Menu
Option B — WooCommerce My Account
- Go to
Recurio → Settings → General - Set Portal Location → My Account
- Save → Settings → Permalinks → Save Changes
- Tab appears automatically in My Account
Customers can now:
- View active subscriptions
- Pause or cancel
- Update addresses
- Change payment methods
Common First-Time Issues
| Problem | Likely Cause | Fix |
|---|---|---|
| Portal not showing | Portal disabled | Enable in Settings → General |
| Payments not renewing | Cron disabled | Enable WP-Cron or real cron |
| Emails not sending | SMTP missing | Configure via WP Mail SMTP |
| No Recurio menu | WooCommerce inactive | Activate WooCommerce |
| Table missing error | Activation skipped | Deactivate & re-activate plugin |
Success Checklist
You’re ready when:
- You can create and sell subscription products
- Customers can manage subscriptions in the portal
- Automatic renewals run daily
- Email notifications send correctly
- Analytics dashboard shows MRR and ARR
Thank You for Choosing Recurio
Your subscription system is now live — sit back, let Recurio handle billing, and focus on growing your business.